It has been a while I've added a new post. I've been moving to a new house. Some weeks later I've been come a father of a beautiful boy. So I hope you will forgive me for the late post. That being said, let's get back to Mendix and build great apps. Off course I will build mine examples in Mendix 5.
The consistency of your data is of great importance of your business processes. If a part of data isn't correct, it can come corrupt with all consequences. On the other hand you want to use conditional visibility in your pages. The user must only see the fields what he needs to fill in.
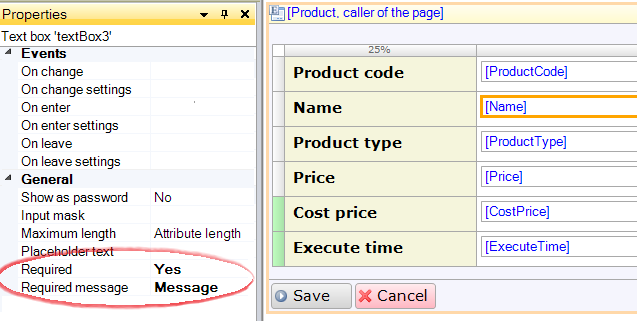
With Mendix you can add default validation checks on fields. Those only work when you don't use conditional visibility. When you set the property 'required' on a field that is placed on a row that is conditional visible, Mendix will generate the error: "Widget may not be required if the containing table row is conditionally visible." To implement validation checks on pages that contain conditional visibility it must be done with microflows.
In this example I use a page to edit a product: Product_NewEdit. The product can be of two types: Stockitem and Service. Based on that selection the user needs to fill in other types of data. The save of the product is handled by a microflow. The best practice to implement validation is the usage of a sub-microflow (a microflow that is called by a microflow).
I create one microflow to validate a product: "SF_Product_Validation" and let the micrflow return a boolean: valid or not. The best way to start is to make a boolean variable that will used as the return value of the microflow. The boolean start with the value "true", we assume that the user gives the right information. Along the way of the microflow each attribute is checked and according how the conditional visibility is build in the page, the visible attributes are checked.

But why the use of a sub-microflow? To create an easier way for maintenance and possibility for unit testing. The best way to build microflows is by creating them in single functions, just like programming for example in Java. Microflows become testable for example unit testing.


